I've been speaking about minimizing the amount of water added to the concrete, and that is critical to achieving the highest strength result. It's equally critical to contain that water during the curing period. It is essential not to let the concrete dry out prematurely. The ideal condition would be to keep it moist for at least seven days.
You can see in the chart on the right there is a huge difference between moist-cured concrete and concrete cured in the air. They're referring to compressive strength, which is certainly important, but it also relates to how much the concrete will shrink, how quickly it will shrink. There are many reasons to want to keep the concrete moist for as long as possible.
This seems poorly understood because there are many people in the industry who think just the opposite. In their mind, it seems desirable to let the sun get at it and let it all dry out, the very opposite of what you're trying to achieve. The managers must ensure that there is always moist-curing as part of the process.
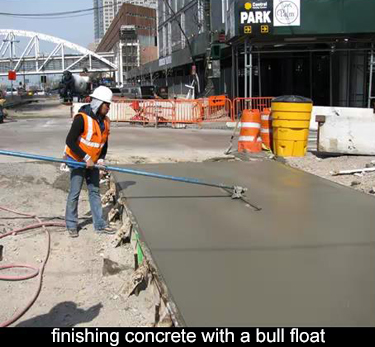
Here's an illustration of spray curing the concrete. One of the quickest things you can do is spray a membrane over the concrete. You can do that almost immediately after the concrete is placed, which is ideal. This is very, very commonly used. I'm a bit old-fashioned. I still like to see a visible membrane being rolled out over the concrete. And I like to see a curing where of water is applied constantly and the concrete is constantly kept damp. I'm not sure that I'm completely sold on the idea of a spray cure. Perhaps it could be one element of a series of steps that you take to ensure moist curing.
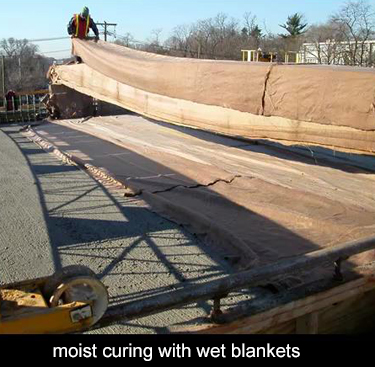
Here's the setup that I think is the ideal. This is what you should be moving towards, in terms of curing the concrete. This shows a bridge surface. The concrete is very freshly placed, and it's immediately covered by these curing blankets. They appear to have already been pre-soaked. They are damp as soon as they go on and I suspect that periodically, they are wet down during the curing period.
Of course, a lot of attention has to be placed at these flat surfaces, exposed to the sun, exposed to the wind. They are going to dry out very quickly, and they need a lot of immediate attention. But even when you're pouring a wall and you reach the top of the wall, you really can't walk away and leave it like that. You're going to get better results if you cover the top of the wall or cover the top of the footing. Whatever it is you're constructing should be covered and the goal should be to retain the moisture as long as possible.
In many cases, the contractor will be trying to strip the formwork as soon as possible, perhaps even within 24 hours, but that leaves the concrete exposed to rapid drying, which is undesirable. If there is a compelling need to remove the formwork, the concrete should still be covered to create this moist environment and enhance the curing.
This is an overhead view. It's the same site in the previous photo. You can see two concrete trucks are in place, placing this concrete. They are placing a micro silica overlay. In other words, the concrete slab is already in place. That's why the trucks can ride on it. They're just putting on a thinner overlay. There is a finishing machine that strikes it off and immediately behind that is a rolling bridge.
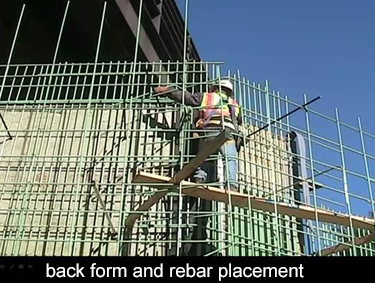
I want to speak about formwork for routine concrete structures. This is an abutment wall for bridge. This is typical of activities required to construct a concrete wall. You begin by erecting the back face of the wall and that's already in place in this photo. After that is erected, it's plumbed and braced, so that it's in exactly its final location. Then the lathers can begin placing the rebar. On the right hand side, you can see a strip of water stop.
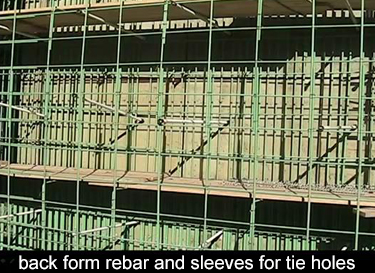 Here's another view of the back face and the rebar in this view has been completed. The white plastic tubing that you see is a sleeve which will contain the tie rods joining the form work together. Formwork for a wall like this consists of a back form and a front form, which are joined together by means of a tie rod. The tie rod is what carries the hydrostatic load of the concrete. And these are very high loads. If you pour the wall reasonably quickly, it will exert a full hydrostatic head for the full height of the wall.
 This is the front face. It's quite typical of the way walls are formed. The formwork is made up of smaller panels, which can be manhandled. Then the panels are ganged together to form larger panels. This is a very efficient way to work. The panels can be rented as well as purchased. You can get many reuses out of panels, which makes them very efficient. At some point where the face of the panel is badly worn, you can simply reface them and get further use out of the panels. This is an excellent procedure for forming these kinds of walls.
continue >