Here is a view of a very wide, very deep excavation. This was on the Boston big dig and this used slurry walls to support the sides of the excavation. Why a slurry wall here? There were a couple of factors. First the close proximity of adjoining structures and most notably, this was hard up against a very active commuter railroad.
The purpose of this excavation was to construct concrete sections of a new tunnel.The sections were individually jacked underneath this live railroad. There was absolutely no interruption to service on this very busy commuter railroad.
In order to create these concrete box sections, and in order to move them around and jack them, you needed a completely unobstructed workspace. You had to create this huge open space, free of any kind of bracing at all. That was accomplished by using only a single upper-level brace.
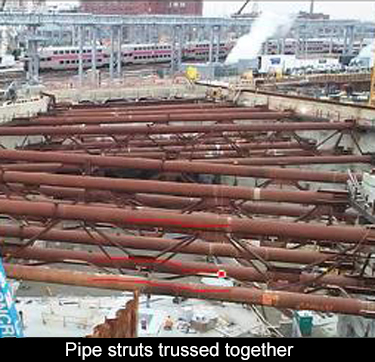 Three heavy pipe struts are joined together to form a truss. That's the only way they can span this great distance. That arrangement of the three of them joined together worked as a unit. There are no additional braces. The rest of the space is open.
That requires an enormously strong wall. And that's why slurry walls were chosen. Not only is there a cage of rebar in this slurry wall, but we also introduced H piles within the cage of rebar to give us as stiff and as strong of a wall possible.
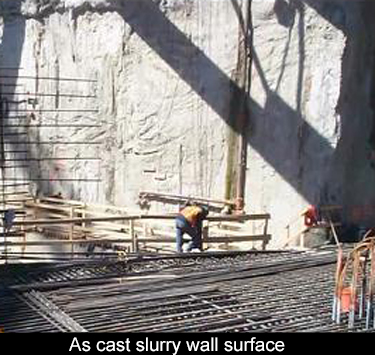 This is a shot inside that excavation and, because of the way the sun is falling on the wall, you can see what a slurry wall actually looks like. This is the as cast appearance. It has this very organic kind of look. It's not what you're used to seeing in a concrete wall, because this wall was not poured again a form. It was poured against the excavated sides of a trench.
It has a very strange look to it and there's only one thing that looks like a slurry wall, and I wanted to share that with you. It's also perfectly dry. There is some evidence of some seepage here, but that's a result of cutting a hole through the wall to introduce some piping,
The slurry wall shown here varied in height from about 90 feet to 110 feet. The wall is four feet thick, and it was constructed in 10 foot panels. We achieved a production rate of one panel every two days, which was really excellent and presents a kind of an optimal production rate.
The reason we were that successful is because we began by pre-excavating a trench the full length of the slurry wall to expose any obstructions. The trench was then back filled with clean material. By investing that time and energy, we were able to have a trouble-free smooth production of the slurry wall itself. A good number to use a good plug number for a slurry wall would be about $200 per square foot. (2009)