We're going to see a video showing the placement of the deck concrete. Before we go to the video, I wanted to talk about this finishing machine. I have watched this machine develop over many, many years. Originally, it was very primitive machine. It just had a kind of a paddle which moved back and forth and struck off the concrete. It has gotten more and more advanced with each generation of the machine. They've added features to it, which have eliminated a tremendous amount of handwork and, at the same time, produces excellent results.
Beginning at the left side, there is a screw here which distributes and levels off the concrete, then this rotating cylinder strikes off the concrete, smooths it out. That's followed by a shape here, which is the equivalent of a Bull Float, which further strikes off the concrete - takes off any finishing marks. Finally, there is a drag, which imparts a pattern in the concrete and roughens the surface of the concrete. You're down to just needing two laborers that roughly distribute the concrete. The machine does the rest and does an excellent job.
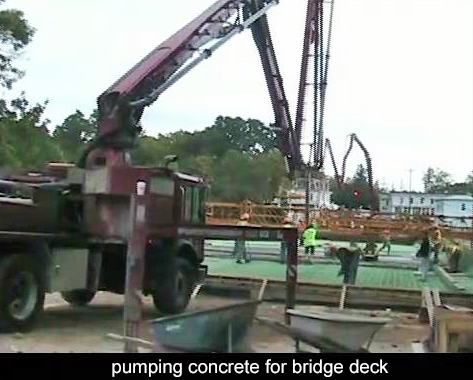 Concrete is being placed here using a concrete pump and you can see the pump on the left hand side of the photo. In the background, you can see a second pump. The concrete is placed in a very specific defined sequence and, on this project, because it is a three-span continuous bridge, the concrete was placed at the two ends simultaneously. When that was completed, concrete was placed at mid-span. The idea was to load those areas where there is a positive moment. After that concrete was set, several days later, the remaining areas which would be over the two piers, that concrete was placed.
In spite of complying very carefully with that pouring sequence, that did not prevent transverse cracking in the areas over the piers. Clearly, this is an area which needs a lot more study. Now you can see the finishing machine at work. Here, the concrete is being placed. The concrete pump places it exactly where it's needed. There's no shoveling here at all. There's just a man guiding the discharge end of the hose and a man vibrating the concrete.
You can see in the background, the pre-wetted curing blanket is being applied, and that is placed as soon as it's safe to walk on the concrete. The idea is to prevent any early escape of moisture from the concrete and this gets to be a real challenge on a hot windy day.
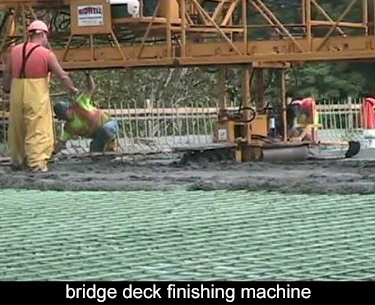 Here, you can see the arrangement of the paving train. In the foreground of the photo is a bridge which spans the work area and is distributing these pre-wetted curing blankets. It rides on rails, and just behind it, you can see the finishing machine itself, which also rides on this pipe rail. The pipe rail is supported by the cantilevered form. You can imagine there's a very considerable load that is transmitted to this cantilevered form, and it has to be designed for this loading, as well as the dead load of the concrete that's being supported.
 This particular project calls for 14 days of wet curing and I think that's excellent. It's also applied very, very quickly. They cover the concrete as soon as you can practically do that. Then they keep the covering wet for 14 days. This device certainly does a good job, but I'm also used to seeing a perforated hose or soaker hose. I guess this device requires somebody to go around and move it. The soaker hose you just install and you can leave it alone.
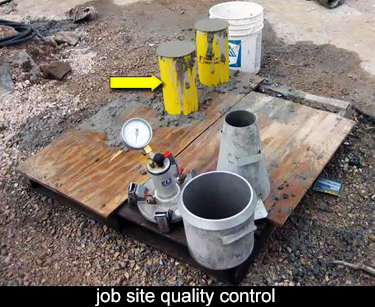 Here are the tools of the trade used to inspect the concrete as it is being placed. In the background are test cylinders, which will be broken at intervals to give you an indication of the compressive strength that you're achieving. The test cylinders are usually cured in water, which is the ideal cure., but that doesn't always match the actual curing that's taking place in the field. It always struck me that there was a disconnect here.
When you want to try to mimic the results that you're achieving in the field, you should cure the cylinders under the same conditions that the concrete is being cured in the field. In this case, the concrete is getting wet cure. So curing these underwater would give you a result that actually matches the product that you're developing in the field. Here's the slump cone. You're already familiar with taking slump measurements. This is the air pot, which gives you a measure of the entrained air in the concrete.